화면 캡쳐(Screen Capture) 하기
바탕화면 정보 얻어와 bmp 저장하기
현재 스크린 화면을 캡쳐하여 그 이미지를 정의된 DIB형식에 따라 BMP파일로 저장하는 방법에
대해서 알아보겠습니다. ( 저장된 파일은 현재 폴더에 'image.bmp' 파일명으로 저장됩니다. )
ShowWindow(SW_HIDE);
// GetDC의 파라메터에 특정 윈도우 핸들을 넣지 않고 NULL을 넣으면
// CWindowDC 형식으로 DC를 얻게 된다.
HDC h_screen_dc = ::GetDC(NULL);
int width = ::GetDeviceCaps(h_screen_dc, HORZRES);
int height = ::GetDeviceCaps(h_screen_dc, VERTRES);
BITMAPINFO dib_define;
dib_define.bmiHeader.biSize = sizeof(BITMAPINFOHEADER);
dib_define.bmiHeader.biWidth = width;
dib_define.bmiHeader.biHeight = height;
dib_define.bmiHeader.biPlanes = 1;
dib_define.bmiHeader.biBitCount = 24;
dib_define.bmiHeader.biCompression = BI_RGB;
dib_define.bmiHeader.biSizeImage = (((width * 24 + 31) & ~31) >> 3) * height;
dib_define.bmiHeader.biXPelsPerMeter = 0;
dib_define.bmiHeader.biYPelsPerMeter = 0;
dib_define.bmiHeader.biClrImportant = 0;
dib_define.bmiHeader.biClrUsed = 0;
BYTE *p_image_data = NULL;
HBITMAP h_bitmap = ::CreateDIBSection(h_screen_dc, &dib_define, DIB_RGB_COLORS, (void **)&p_image_data, 0, 0);
// 이미지 패턴을 얻을 수 없기 때문이다.
HDC h_memory_dc = ::CreateCompatibleDC(h_screen_dc);
HBITMAP h_old_bitmap = (HBITMAP)::SelectObject(h_memory_dc, h_bitmap);
::BitBlt(h_memory_dc, 0, 0, width, height, h_screen_dc, 0, 0, SRCCOPY);
::SelectObject(h_memory_dc, h_old_bitmap);
DeleteDC(h_memory_dc);
BITMAPFILEHEADER dib_format_layout;
ZeroMemory(&dib_format_layout, sizeof(BITMAPFILEHEADER));
dib_format_layout.bfType = *(WORD*)"BM";
dib_format_layout.bfSize = sizeof(BITMAPFILEHEADER) + sizeof(BITMAPINFOHEADER) + dib_define.bmiHeader.biSizeImage;
dib_format_layout.bfOffBits = sizeof(BITMAPFILEHEADER) + sizeof(BITMAPINFOHEADER);
FILE *p_file = fopen("image.bmp", "wb");
if(p_file != NULL){
fwrite(&dib_format_layout, 1, sizeof(BITMAPFILEHEADER), p_file);
fwrite(&dib_define, 1, sizeof(BITMAPINFOHEADER), p_file);
fwrite(p_image_data, 1, dib_define.bmiHeader.biSizeImage, p_file);
fclose(p_file);
}
if(NULL != h_bitmap) DeleteObject(h_bitmap);
if(NULL != h_screen_dc) ::ReleaseDC(NULL, h_screen_dc);
ShowWindow(SW_SHOW);
바탕화면 정보 얻어와 jpeg 저장하기
GetWindowRect(윈도우 크기 알아내기),CImage .Save(파일저장),ShellExecute(파일실행)
1.GetWindowRect() 는 윈도우의 크기를 알아내서 RECT 에 넣어주는 함수이다.
2.Save() 함수는 현재 선택한 비트맵 이미지를 주어진 파일 형식으로 변환하여 저장한다.
3. ShellExecute() 파일 실행 하는 함수 이다
void C수업View::OnLButtonDown(UINT nFlags, CPoint point)
{
// TODO: 여기에 메시지 처리기 코드를 추가 및/또는 기본값을 호출합니다.
//바탕 화면 왼도우 객체에 대한 포인터를 얻음
CWnd* pWndDesktop = GetDesktopWindow();
CWindowDC ScrDC(pWndDesktop); // 바탕 화면 윈도우 DC
CClientDC dc(this); // 뷰 윈도우 DC
//바탕 화면 윈도우의 크기를 알아낸다
CRect Rect;
pWndDesktop->GetWindowRect(&Rect);
//바탕 화면 크기 및 색상 수와 동일한 비트맵 이미지를 만든다
CImage Image;
int cx = Rect.Width(); //바탕 화면 폭
int cy = Rect.Height(); //바탕 화면 높이
Image.Create(cx,cy,ScrDC.GetDeviceCaps(BITSPIXEL));
//이미지 DC와 화면 DC에 바탕 화면 윈도우 화면을 출력한다
CDC* pDC = CDC::FromHandle(Image.GetDC());
pDC->BitBlt(0,0,cx,cy,&ScrDC,0,0,SRCCOPY);
dc.BitBlt(0,0,cx,cy,pDC,0,0,SRCCOPY);
Image.ReleaseDC();
//jpeg 형식으로 바탕 화면 이미지를 저장한다.
Image.Save(TEXT("Desktop.jpg"), Gdiplus::ImageFormatJPEG);
//저장된 이미지를 뷰어를 실행하여 보여준다
::ShellExecute(NULL,
TEXT("open"),TEXT("Desktop.jpg"),
NULL,NULL,SW_SHOW);
}
DC 를 이용한 BMP 저장하기
void ScreenCapture() { int nScreenWidth = GetSystemMetrics(SM_CXSCREEN); int nScreenHeight = GetSystemMetrics(SM_CYSCREEN); HWND hDesktopWnd = GetDesktopWindow(); HDC hDesktopDC = GetDC(hDesktopWnd); HDC hCaptureDC = CreateCompatibleDC(hDesktopDC); HBITMAP hCaptureBitmap =CreateCompatibleBitmap(hDesktopDC, nScreenWidth, nScreenHeight); SelectObject(hCaptureDC,hCaptureBitmap); BitBlt(hCaptureDC,0,0,nScreenWidth,nScreenHeight, hDesktopDC,0,0,SRCCOPY|CAPTUREBLT); SaveCapturedBitmap(hCaptureBitmap); ReleaseDC(hDesktopWnd,hDesktopDC); DeleteDC(hCaptureDC); DeleteObject(hCaptureBitmap);
}
GDI+ 를 이용한 JPEG 저장 01
출처 : http://cafe.naver.com/cyberzone.cafe?iframe_url=/ArticleRead.nhn%3Farticleid=193
Scribble 예제는 다들 아시겠지만
마우스로 슥슥 그림 그리는 기능을 보여주는 예제입니다.
1) stdafx.h에서 다음 내용 추가.
#include <gdiplus.h>
2) APP 클래스에 멤버 변수 추가 ULONG_PTR m_gdiplusToken;3) InitInstance() 수정 if (!AfxOleInit())
{
AfxMessageBox(IDP_OLE_INIT_FAILED); return FALSE; } Gdiplus::GdiplusStartupInput gdiplusStartupInput; Gdiplus::GdiplusStartup(&m_gdiplusToken, &gdiplusStartupInput, NULL);
4) ExitInstance() 오버라이드하여 수정
Gdiplus::GdiplusShutdown(m_gdiplusToken);그리고 툴바에 JPG라는 버튼 추가.JPG 툴바 버튼을 누르면 현재 뷰의 내용을 BitBlt으로 복사하여 CBitmap 생성.그런 다음 ImageFormat 클래스를 이용하여 JPG로 변환 저장.다음은 JPG 단추 핸들러입니다.void CScribbleView::OnSaveasJpg(){ CDC* windc = GetDC(); CDC memdc; memdc.CreateCompatibleDC(windc); CRect rect; GetClientRect(&rect); CBitmap bitmap; bitmap.CreateCompatibleBitmap(windc, rect.Width(), rect.Height()); memdc.SelectObject(bitmap); memdc.BitBlt(0, 0, rect.Width(), rect.Height(), windc, 0, 0, SRCCOPY);
ImageFormatPtr img = ImageFormat::create(); img->loadAndSaveAs((HBITMAP)bitmap, 0, L"jpg", L"test.jpg");}간편하죠?========================================================================================
GDI+ 를 이용한 JPEG 저장 02
출처 : http://icarosss.egloos.com/1191615
HBITMAP 으로 부터 JPEG으로 변환을 하고 싶을 경우가 있다.본인은 캡쳐장치로 부터 이미지를 받아서 편집작업을 하고 그 영상을 캡쳐또는 녹화할때 편집작업을 GDI+를 이용해서 구현하였다.카메라로부터 들어오는 이미지 스트림을 memory DC에 그리고 그 DC를 비트맵화 하면 HBITMAP을 얻을 수 있다.여기서 얻은 HBITMAP을 JPEG으로 변환 해보자.// HBITMAP을 가져옴Bitmap *bit = Bitmap::FromHBITMAP(hBitmap, 0); // 2번째 파라미터는 0으로 해도 무방하다.위의 두번째 파라미터때문에 고민 많이 했었는데 무방하다고 판단하였다..^^;;Bitmap을 생성했으면 압축 Encoder를 가져와야 하는데 다음 함수로 한번에 해결된다. BOOL GetEncCLSID(WCHAR *mime, CLSID *pClsid) { UINT num,size,i; ImageCodecInfo *arCod; BOOL bFound=FALSE; GetImageEncodersSize(&num,&size); arCod=(ImageCodecInfo *)malloc(size); GetImageEncoders(num,size,arCod); for (i=0;i<num;i++) { if(wcscmp(arCod[i].MimeType,mime)==0) { *pClsid=arCod[i].Clsid; bFound=TRUE; break; } } free(arCod); return bFound; }CLSID Clsid;GetEncCLSID(L"image/jpeg",&Clsid); // 1번 파라미터를 바꿔주면 어떤포멧으로도 변환 가능하다.위함수로 얻은 Clsid를 이용해 비트맵을 저장하면 완료 // Save File Status s = bit->Save(wszPath, &Clsid);GDI+야 고맙다..
GDI+ 를 통해 이미지 파일을 출력하기
// stdafx.h 에 추가#include #pragma comment(lib, "gdiplus")using namespace Gdiplus;
// 전역 변수 선언ULONG_PTR gdiplusToken;
//InitInstance 에 추가GdiplusStartupInput gdiplusStartupInput;if(::GdiplusStartup(&gdiplusToken, &gdiplusStartupInput, NULL) != Ok){ AfxMessageBox(_T("Error : Failed to initialize GDI+ library")); return FALSE;}//ExitInstance 에 추가::GdiplusShutdown(gdiplusToken);
//OnPaint 에 추가CPaintDC dc(this); // 그리기를 위한 디바이스 컨텍스트Graphics graphics(dc);graphics.SetSmoothingMode(SmoothingModeHighQuality);Image image(_T("capture.jpg"));
graphics.DrawImage(& image, 0, 0, image.GetWidth() / 2, image.GetHeight() / 2);
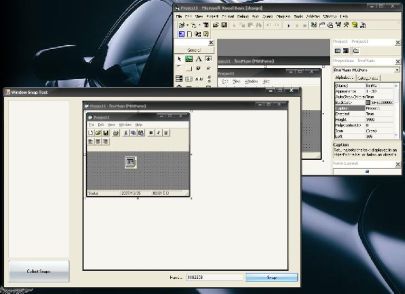
가려진 윈도우 캡쳐

BOOL Capture(HWND hTargetWnd, LPCTSTR lpszFilePath)
| { CRect rct; if(hTargetWnd) ::GetWindowRect(hTargetWnd, &rct); else return FALSE; HBITMAP hBitmap = NULL; HBITMAP hOldBitmap = NULL; BOOL bSuccess = FALSE; HDC hDC = ::GetDC(hTargetWnd); HDC hMemDC = ::CreateCompatibleDC(hDC); hBitmap = ::CreateCompatibleBitmap(hDC, rct.Width(), rct.Height()); if(!hBitmap) return FALSE; hOldBitmap = (HBITMAP)SelectObject(hMemDC, hBitmap); if(!::PrintWindow(hTargetWnd, hMemDC, 0)) bSuccess = FALSE; else bSuccess = TRUE; //Save 함수 : http://blog.daum.net/odega/25 if(bSuccess && !Save(hBitmap, lpszFilePath)) bSuccess = FALSE; else bSuccess = TRUE; SelectObject(hMemDC, hOldBitmap); DeleteObject(hBitmap); ::DeleteDC(hMemDC); ::ReleaseDC(m_hWnd, hDC); return bSuccess; } |
Background
I needed to capture from the minimized window for one of my projects. After several tries of using ordinary methods and failing; I searched the Web a lot (OK, not a lot) but couldn't find a solution, so I decided to work on a new one.
First Words
First of all, thank God for saving my head from blowing out, because I needed to do that really.
Maybe this method is not such a reliable one, but it solved my problem and may be useful for some others, so I thought putting it on The Code Project is better than not doing so.
By the way, this is my first CodeProject article, so forgive me if you see any flaws in it, and please help me with your suggestions for my further actions.
The Problem
OK, the core of this method is the PrintWindow API which draws the face of the window on the specific Device Context.
This method can be used to capture a window regardless of its order and transparency level (it can capture from a partially or fully hidden window), but the main problem is, it cannot capture the minimized window, actually when the window is minimized, it won't be drawn anymore, so if we use PrintWindow it only gives the title of the window back to us.
I tried several methods for capturing a minimized window but I failed, except this one.
How to Capture
I assumed there is no way to capture from the minimized window, so this assumption changed the approach.
I tried to make the window back to normal and capture it then, and then minimize it again; for having a hidden capture, before we pop-up the window from minimized, it must be transparent and it can be done using theSetLayeredWindowAttributes API, but there was another problem. Again the animation of popping up window was shown, even if the window was fully transparent.
By using SPY++, I monitored the messages for explorer and then unchecked "Animate Windows when minimizing and maximizing" and found this message SPI_SETANIMATION then, with a few searches, I found that it can be changed through the SystemParametersInfo API.
This effect can be disabled through the registry, but it's not real-time.
HKEY_CURRENT_USER\Control Panel\Desktop\WindowMetrics\MinAnimateIf the value is 0, the effect is disabled, and for 1 it is enabled.
So here are the steps I followed to capture a minimized window:
- Disable
MinAnimateeffect - Transparent the window (
PrintWindowcan take a snap from such a window) - Restore the Window
- Capture
- Minimize it again
- Remove transparency
- Enable
MinAnimateeffect
Now let's check the codes.
1 & 7 - Disable/Enable MinAnimate Effect
I forgot to mention, I say MinAnimate because it's the name in the Registry.
As I mentioned before, it can be done by using SystemParametersInfo, here it is:
(This snippet is in XPAppearance.cs)
[DllImport("user32.dll", SetLastError = true)]
[return: MarshalAs(UnmanagedType.Bool)]
private static extern bool SystemParametersInfo(SPI uiAction, uint uiParam,
 ref ANIMATIONINFO pvParam, SPIF fWinIni);
SPI is an enumeration of SPI messages, we want to disable/enable the MinAnimate so we must set uiAction toSPI_SETANIMATION.
We can get/set the effect status in ANIMATIONINFO structure.
As a note, cbsize member of ANIMATIONINFO must be set to the size of the structure, and pvParam must also be equal to cbSize.
Here is the structure:
(This snippet is in XPAppearance.cs)
[StructLayout(LayoutKind.Sequential)]
private struct ANIMATIONINFO
{

   public ANIMATIONINFO(bool iMinAnimate)
   {
      this.cbSize = GetSize();
      if (iMinAnimate) this.iMinAnimate = 1;
      else this.iMinAnimate = 0;
   }

   public uint cbSize;
   private int iMinAnimate;

   public bool IMinAnimate
   {
      get
      {
         if (this.iMinAnimate == 0) return false;
         else return true;
      }
      set
      {
         if (value == true) this.iMinAnimate = 1;
         else this.iMinAnimate = 0;
      }
   }

   public static uint GetSize()
   {
      return (uint)Marshal.SizeOf(typeof(ANIMATIONINFO));
   }
}
And here is the method I used for disable/enable MinAnimate:
(This snippet is in XPAppearance.cs)
public static void SetMinimizeMaximizeAnimation(bool status)
{
   ANIMATIONINFO animationInfo=new ANIMATIONINFO(status);
   SystemParametersInfo(SPI.SPI_GETANIMATION, ANIMATIONINFO.GetSize(),
    ref animationInfo, SPIF.None);

   if (animationInfo.IMinAnimate != status)
   {
      animationInfo.IMinAnimate = status;
      SystemParametersInfo(SPI.SPI_SETANIMATION, ANIMATIONINFO.GetSize(),
       ref animationInfo, SPIF.SPIF_SENDCHANGE);
   }
}
I think there is nothing to explain with the code above.
2 & 6 - Add/Remove Transparency
For making the window invisible but with capturing ability, we can make it transparent.
It can be done somewhat like this:
(This snippet is in WindowSnap.cs)
[DllImport("user32")]
private static extern int GetWindowLong(IntPtr hWnd, int index);

[DllImport("user32")]
private static extern int SetWindowLong(IntPtr hWnd, int index, int dwNewLong);

[DllImport("user32")]
private static extern int SetLayeredWindowAttributes(IntPtr hWnd, byte crey,
 byte alpha, int flags);
(This snippet is in EnterSpecialCapturing method in WindowSnap.cs)
winLong = GetWindowLong(hWnd, GWL_EXSTYLE);
SetWindowLong(hWnd, GWL_EXSTYLE, winLong | WS_EX_LAYERED);
SetLayeredWindowAttributes(hWnd, 0, 1, LWA_ALPHA);
For removing applied transparency, we can do it by setting the old winLong again.
(This snippet is in the ExitSpecialCapturing method in WindowSnap.cs)
SetWindowLong(hWnd, GWL_EXSTYLE, winLong);3 & 5 - Restore/Minimize The Window
This part is fairly easy, it can be done using the ShowWindow API.
(This snippet is in WindowSnap.cs)
[DllImport("user32")]
[return: MarshalAs(UnmanagedType.Bool)]
static extern bool ShowWindow(IntPtr hWnd, ShowWindowEnum flags);

private enum ShowWindowEnum{Hide = 0,
ShowNormal = 1,ShowMinimized = 2,ShowMaximized = 3,
Maximize = 3,ShowNormalNoActivate = 4,Show = 5,
Minimize = 6,ShowMinNoActivate = 7,ShowNoActivate = 8,
Restore = 9,ShowDefault = 10,ForceMinimized = 11};
(This snippet is in EnterSpecialCapturing method in WindowSnap.cs)
ShowWindow(hWnd, ShowWindowEnum.Restore);And for minimizing it again, we can use:
(This snippet is in the ExitSpecialCapturing method in WindowSnap.cs)
ShowWindow(hWnd, ShowWindowEnum.Minimize);4 - Capture
Nothing to say, there are dozens of articles about it; here is the code:
(This snippet is in the GetWindowImage method in WindowSnap.cs)
Bitmap bmp = new Bitmap(size.Width, size.Height);
Graphics g = Graphics.FromImage(bmp);
IntPtr dc = g.GetHdc();

PrintWindow(hWnd, dc, 0);

g.ReleaseHdc();
g.Dispose();
Capturing Child Windows
Capturing from MDI children is very similar to capturing ordinary windows, but with one exception, if the child window is partially hidden by the parent (and not another child), that part would be drawn as blank. For solving this problem, we can use GetParent and SetParent APIs to make it as an ordinary window and back.
[DllImport("user32")]
private static extern IntPtr GetParent(IntPtr hWnd);
[DllImport("user32")]
private static extern IntPtr SetParent(IntPtr child, IntPtr newParent);
We can pass IntPtr.Zero to newParent in the GetParent method for making it normal (not child).
Last Words
That's all, and for the last words, you can take a snap from Windows using WindowSnap class. It has two methods,GetAllWindows and GetWindowSnap. The first one returns a collection of window snaps from all available windows, and the second one returns a snap of the specific window.
Finally, I thank you for spending your time and reading this article. I hope it would be useful. Please help me with your suggestions and ideas for making this article better.
Updates
- 6th October, 2007
- Capturing Child Windows: Support for child windows added. Special thanks to mmjc23 who mentioned that. For more details, see Capturing Child Windows section.
- MinAnimate Bug Fix: In the previous version, if
MinAnimateeffect was disabled,WindowSnapwould enable it afterSpecialCapturing(capturing from minimized window). Special thanks to Kalabuli who notified me about this bug.
- 10th October, 2007
- Child Dialog Capturing Fix: Capturing from Modal child dialogs fixed. Special thanks to Hitesh who notified me about this bug.
License
This article, along with any associated source code and files, is licensed under The Code Project Open License (CPOL)
'C & C++ > MFC Media' 카테고리의 다른 글
| 마우스 커서 포함하여 이미지 캡쳐 (0) | 2014.11.10 |
|---|---|
| GDI+ 설정(셋팅) 하기 (0) | 2014.08.14 |
| BMP 투명화 처리 (0) | 2012.11.09 |
| WM_PAINT 메세지에 대하여... (0) | 2012.10.05 |
| picture control 투명화 처리 (0) | 2012.08.30 |

댓글